Large cabinet interiors are useful for storing taller items and providing lots of arm space for you to rummage around in, but they frequently leave too much-wasted space for vertical storage.
If you’re like most homeowners, the shelves in your kitchen cabinets aren’t always in the right place, the right size, or space the way you’d like them to be.
You might occasionally want to add new shelves to a cabinet. If you want to make the changes yourself, you’ll need trustworthy installation instructions like the ones listed below. This may include adding more shelves.
Table of Contents
Materials Needed
- Measurement tape and a level
- Drill and drill bit
- Shelves
- Shelving Pegs
You should keep these close at hand to ensure that every installation step is carried out as accurately as possible. Take out your preferred drill, making sure to use a drill bit that is the same size as the shelving pegs you intend to use. When ordering, use the width and depth of your cabinet’s interior as a guide to determine the proper shelf size. These come in a variety of materials and colors to best match the design of your cabinet and can be bought in any general hardware store or online.
Shelve Installation Procedure
Step 1: Prepare Your Cabinet
It can be limited to working in a small cabinet. You may frequently make errors that could be prevented if you weren’t so frustrated. You’ll find it simpler to work in your cabinet if you first remove the doors, shelving, and any of the contents, even though it might initially take more time.
Step 2: Measure Cabinet Space
You must be aware of the height, width, and depth of the space where your shelf will be placed in order to properly measure and purchase your shelving material. If you want to accurately match the existing shelves with your new shelf, you’ll need to know their thickness in addition to the interior dimensions of your cabinet.
Step 3: Cut And Plan Your Shelf
Cut your shelf from a piece of 1-inch lumber, plywood, or fiberboard based on the cabinet’s dimensions. Make this cut with a table saw, leaving enough material on the outside edges of the board to compensate for the material that will be lost during edge-planing. The shelf edges can be planned using a planning blade on your bench saw if you don’t have access to a jointer.
Step 4: Place Marks For Shelf Brackets
You should measure and mark the locations where your shelf brackets will go on the inside of your cabinet: two at each end and one in the middle of the back surface. Ensure that the shelf guidelines are equally spaced and plumb.
Step 5: Attach Your Brackets
To create screw guide holes for your brackets’ attachment, use a drill. Carefully measure the locations of these holes. Because the screw holes in each bracket are spaced equally apart, you’ll need to take special care to drill holes that will be level across all brackets. Screws inserted into the guide holes will be used to attach your brackets. Test that the shelf sits flat and securely by fitting it onto the brackets that have already been installed.
Step 6: Finish Your Own Self
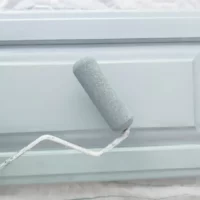
Your new shelf should be primed. Let it dry. Brush on varnish, stain, or paint to match the shelves and cabinet’s finish, and then give it time to dry. Apply a final coat of paint or varnish after using steel wool to smooth the finish, if required.
Replace cabinet doors and the shelves you removed once your new shelf finish has dried.