Adding custom cabinets to a kitchen remodel costs a lot of money. But making them yourself can help you save a lot of money. Have you ever considered constructing a wall cabinet on your own?
It’s simpler than you might think to build your own wall cabinets. Building a larger drawer would be comparable to the construction process.
This tutorial will teach you how to construct a plywood wall cabinet as a do-it-yourself project to provide your home with the ideal storage option! Let’s started
Table of Contents
What To Consider When Building A Wall Cabinet?
Before creating your wall cabinet plans, you need to decide on a few things if you’re building your own wall cabinets. To help you decide, let’s look at the various options you have when building wall cabinets.
What Kind Of Cabinet Do You Want?
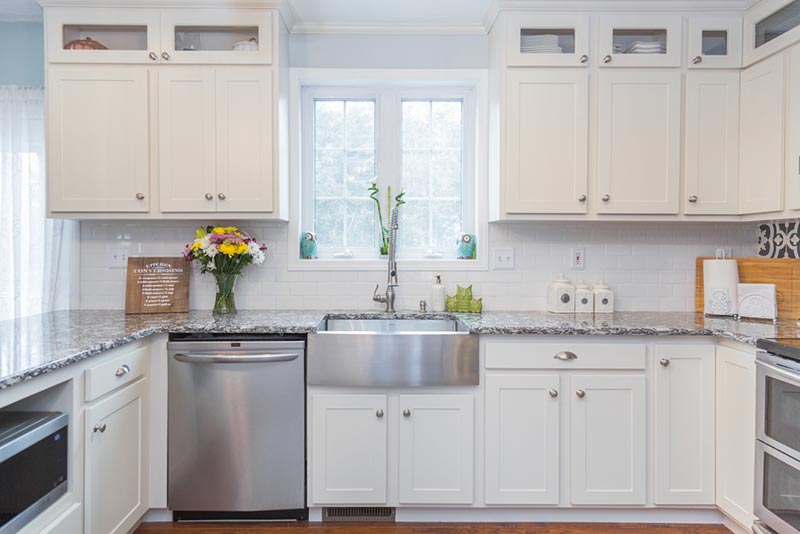
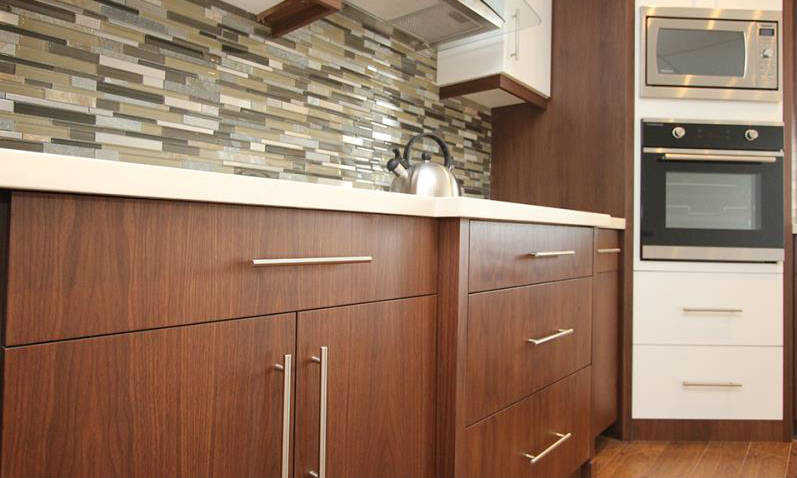
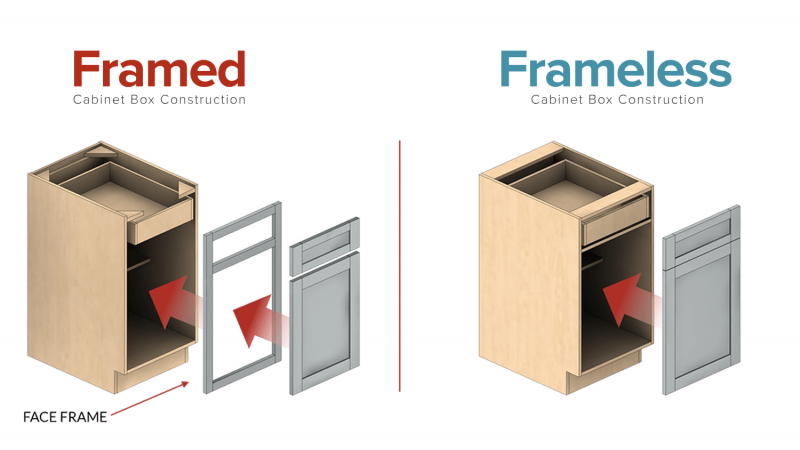
Both face frame and frameless (European style) wall cabinets are options for construction. To determine which type of cabinet is best for you, read all about the various types (including pictures) here.
How Tall Are Wall Cabinets?
Your wall cabinet’s height will be determined by the height of the ceiling in the area where you are installing it and the amount of space you need to allow for clearance under the cabinets. The appeal of DIY is that you can make them any height you like, though! Here are some common heights to help you get started on designing your own kitchen.
Depending on where you install them, standard kitchen wall cabinets can be installed anywhere between 12 and 42 inches high.
- Standard cabinets: 36″
- Tall cabinets: 42″
- Above stove cabinets: 12″ to 18″
- refrigerator cabinets above: 18″ to 24″
To be able to use the countertops below wall cabinets in a kitchen, there must be space. The following is typical advice for required clearances:
- 18″ above the countertop
- 24″ above the stove (this is the clearance for the hood or microwave, cabinets will start above that)
- 24″ to 36″ above the sink
You must leave enough space below laundry room cabinets if you have a top-loading washing machine in order to fully open the door.
When using base cabinets at the bottom as support for built-ins, there is typically no clearance requirement. You can also reach the ceiling all the way or leave space above for display.
In order to add crown molding to the top of your cabinets, you must leave a small opening there rather than continuing all the way to the ceiling. The crown molding will then be used to conceal this.
The Depth Of Wall Cabinets
Depending on the type of cabinet you are building, the depth of your wall cabinets is comparable to the height. However, you are creating this custom in order to fulfill your desires.
For various wall cabinets, the following standard depth recommendations are provided.
- Kitchen Cabinets: 12″ is standard, but you can go up to 18″
- Over refrigerator cabinets: 18″ to 30″
- Pantry Cabinet: 24″ to 30″
- Built-ins: bookcases are typically 12″ deep
Tools And Materials Needed
- ¾” plywood
- ¼” plywood for the back
- Drill
- Shelf pin hole jig
- Square
- Table saw or a track saw (you could use a circular saw, but your cuts won’t be as clean)
- Edge banding
- Edge banding trimmer
- Pocket hole jig and 1 ¼” pocket hole screws OR countersink bit and 2″ wood screws
- Wood glue
- Clamps
How To Build A Wall Cabinet By Yourself?
Measure And Sketch A Design
Before you begin building your wall cabinets, it’s crucial to take accurate measurements and make a quick sketch because every space is unique. You should consider the following standard dimensions:
- The standard depth of wall cabinets is 12-18 inches, including the doors. 12 inches is common for kitchen cabinets, so you have plenty of room to work on the countertop below. Floor-to-ceiling pantry cabinets can range in size depending on the available space, and cabinets over the refrigerator are typically 24″ deep.
- Wall cabinet widths can range from 9″ to 48″, but you should consider keeping them under 36″ wide to prevent sagging. 30″ is standard for a two-door wall cabinet.
- Wall cabinet height depends on your ceiling. Depending on the look you want, upper cabinets can be any height as long as they are installed 18″ above the countertop. Consider any crown molding or soffits you intend to add to the room.
- The top and bottom pieces should be between the sides for added shear strength. When it’s loaded down with heavy dishes, you don’t want the bottom to come out!
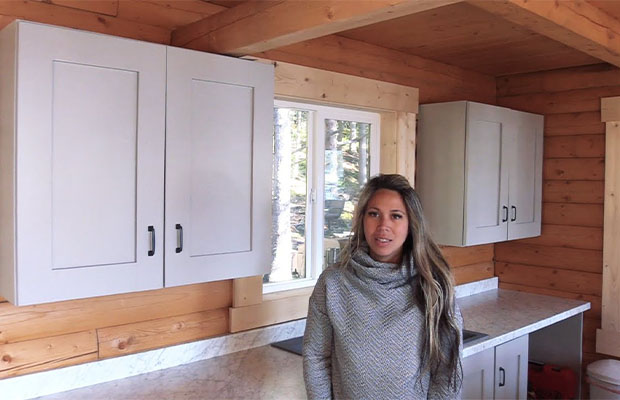
In my kitchen, I constructed three base cabinets that would fit along one wall and gave the wall cabinets the same widths. A custom-sized width fits the space in the middle of the cabinet, which has a 30″ cabinet on either side. Due to the wall cabinets’ 34″ height, there are two inches of trim room between the tops of the cabinets and the ceiling.
Cut The Plywood Pieces
The components of a wall cabinet are two sides, a top, a bottom, shelves, and a back. There are two strips of wood behind the back of the cabinet if the back is made of a thin ¼” material to further secure the cabinet to the wall. See my post on the components of a cabinet for more information and diagrams.
Keep the direction of the wood grain in mind when making the cuts if you’re not painting the inside of your cabinets. The grain should run vertically on the side and back pieces, and horizontally for the top, bottom and shelves.
I had two sheets cut down into more manageable sections at the lumber yard because I’m using ¾” prefinished birch plywood for my kitchen cabinets. Cut into 36″ x 48″ pieces, and one sheet will serve as the cabinet sides. The other sheet, which was cut into 30″ x 48″ sections, will be used for the tops, bottoms, and shelves.
I used my track saw to clean up the cut edges and get the final length for all the pieces, which was 1″.
Now that the fence on my table saw has been set, I can cut all the sides, tops, bottoms, and shelves to the same width. For these repeatable cuts, a circular saw with an edge guide or a track saw with parallel guides could also be used.
To prevent mixing up, be sure to label your parts as you go. I mark with painter’s tape to prevent having to later sand the markings away. For the nailer strips, keep any extra pieces that are at least 3″ wide.
Cut The Groove For The Back Panel (optional)
Installing a cabinet’s back panel can be done in a variety of ways. Even if you simply staple the back in place, the cabinet’s interior will still show the nailer strips. In order to conceal the nailer strips behind the back, I prefer to cut a groove into each piece for the back to slide into.
This groove can be cut using a table saw, router, circular saw, track saw, or edge guide on a track saw. Since this groove only requires two passes through the saw to cut it out perfectly, I prefer to use a single blade rather than a dado stack.
The blade height should first be adjusted to allow it to cut through the wood at least one-third of the way. I set mine for ¼” to make the math simpler, but I probably should have made it closer to 38″ so the back wouldn’t pop out so easily.
Using a scrap of the same plywood that you’ll be using for the nailer strips, measure the distance from the blade to the fence.
The first groove can be cut using a scrap piece of plywood; afterward, set it aside. Cut all of the side, top, and bottom pieces using the same setting.
Now shift the fence to the right slightly to widen the groove. Test the fit of the ¼” plywood by cutting the test piece through the saw. Continue adjusting the spacing until it slides in easily and settles into place securely.
Run all the components through once more to establish the groove once the settings are perfect.
Before you move the fence, there’s one more cut to make. Before, the top and bottom of the shelves were cut to the same size, but now the back panel will be in the way.
To ensure that the shelf’s back sits perfectly flush with the cabinet’s front, you can trim it using the same table saw setting. All the shelves need to be run through the saw to raise the blade so it completely cuts through the plywood.
You might need to clean the saw blade if your cuts aren’t coming out as clean as you’d like. The glue used to join the layers of plywood can accumulate on the teeth after numerous cuts, leading to burning and tear-out. Compared to buying a new blade, it is quicker and less expensive!
Cut The Plywood Back
You can cut the plywood back to fit now that you are aware of the depth of your groove. It should consist of the opening’s size plus the width and depth of each side’s grooves. To ensure that it slides in easily during assembly, I typically make mine slightly smaller in both directions.
Apply Edge Banding
Since these are frameless wall cabinets, the plywood edge needs to be covered so that the layers are hidden. I have a detailed tutorial on applying edge banding, so I’ll just go over the fundamentals here.
Choose edge banding that matches the plywood if you’re not painting your cabinet. I used prefinished birch edge banding since I’m making these wall cabinets from birch plywood.
Apply the edge banding to the edge opposite the groove you just cut. Put some iron pressure on it, then use an edge banding trimmer to trim off the extra.
Because you can see the underside of these upper cabinets while seated at the dining table, I also added edge banding to the bottom of the side pieces.
Drill Shelf Pin Holes
Drilling the shelf pin holes now rather than after the cabinet is put together is much simpler. There are numerous shelf pin jigs available that make it simple to achieve the desired spacing using only a drill.
However, I’ve discovered that the drill bit can produce a ragged hole, so I chose a router setup instead. It was an investment that paid off because I build A LOT of cabinets! In a subsequent tutorial, I’ll go into more detail about this procedure.
Remember that you don’t have to drill holes all the way through the side pieces. You won’t raise a shelf even an inch from the floor! The first hole should be drilled in the center, followed by 5-7 holes in each direction from the point.
Drill Pocket Holes Or Countersink Holes
If you have a pocket hole jig, you can use it to drill pocket holes into the top and bottom pieces’ ends. Make sure the face opposite the groove has these holes!
As you can see while seated at the adjacent dining table, I didn’t want to leave any pocket holes on the underside of the cabinets. I chose to simply drill countersink holes because I’m going to cover the sides with an end panel anyhow.
With the edge banding facing up, place the bottom between the two sides. To keep the pieces together, use clamps. On both sides, measure and mark 38″ from the top and bottom.
To make a recess for the screw head at each of your markings, predrill the holes with a countersink bit. This one makes neat holes at a constant depth, which is why I really like it. If you’re not familiar with this method, I have a thorough tutorial on how to countersink screws.
Assemble The Wall Cabinet Parts
The wall cabinet assembly is simple after all that preparation! Apply wood glue to the bottom piece’s two ends. To ensure squareness, clamp the two sides to the bottom. After that, insert 2″ wood screws or pocket hole screws into the already-drilled holes to fasten them together.
The cabinet’s top grooves will accommodate the back panel as you slide it there.
Fit the back into the groove after applying wood glue to both ends of the top piece. Screw the top into place after aligning it flush with the tops of the sides.
By taking measurements across the diagonal in both directions, you can determine whether your wall cabinet is square. The tape measure on the corner is kept in place with the aid of this tiny device. The object is square if the measurements match. If it isn’t, use a clamp to bring the opposing corners of the longer measurement together and straighten it out.
Attach The Nailer Strips
Do you still have those thin strips from cutting the plywood pieces? Now you can put them to use! Cut them to fit inside the back of the cabinet, across the top and bottom. To attach the nailer strips, I used pocket holes, but you could use the same countersink method as before.
When attaching the cabinet to the wall, the nailer strips provide something substantial to screw through. Additionally, they aid in avoiding cabinet racking and installation-related alignment issues. The nailer strips at the wall studs and the spot where I drilled through the cabinet’s back are both visible.
Read More: How To Remove Odor From Wood Cabinets?
The Bottom Line
You can create all kinds of storage for your home now that you understand how to build a wall cabinet!
I sincerely hope that this guide on how to build a wall cabinet and door was beneficial and made the process of building face frame cabinets with inset doors and crown molding simpler!
cabinets for the laundry room, built-ins for the living room, and a cabinet for the bar… there are so many options! More cabinet DIY, read our post on How To Build A Simple Cabinet Box.
Also Read: How to Build Cabinets for An RV?