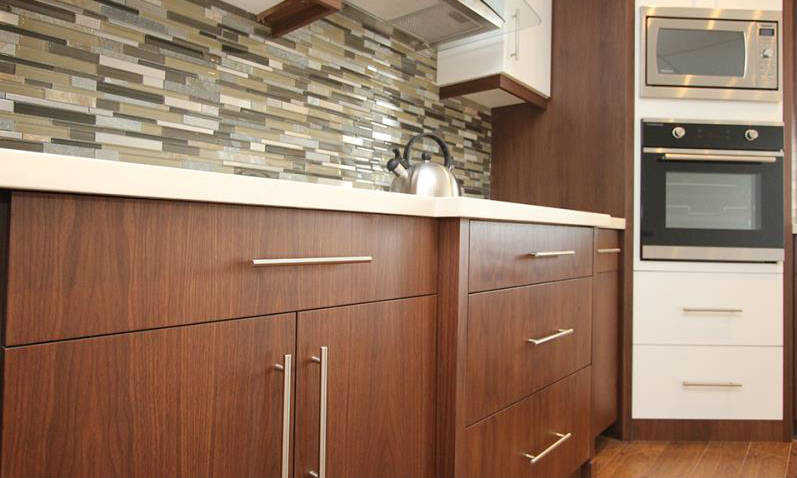
The durability of your kitchen or bathroom cabinets as well as their appearance can be greatly influenced by the cabinet doors. Do you know how to make cabinet doors? The quality of the materials and workmanship used to construct the cabinet doors is the key.
Table of Contents
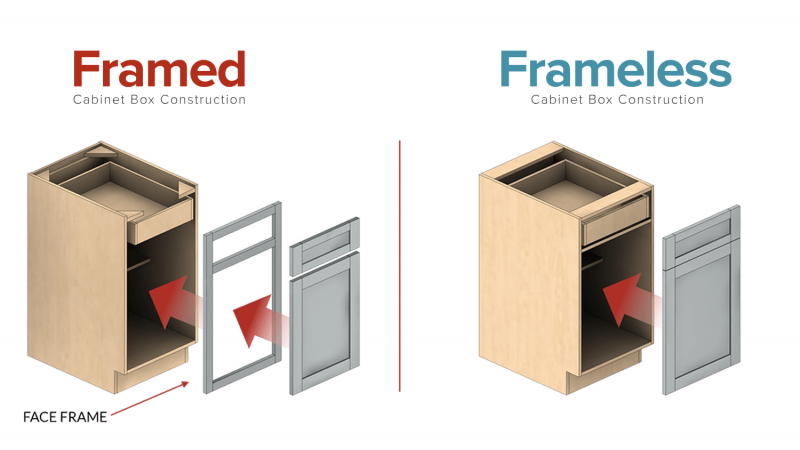
Cabinet Door Components
Two stiles, two rails, and a center panel make up each door. The ultimate cabinet door size and your chosen method of construction will determine the precise measurement of each item.
Your cabinet door rails and stiles can be any width you desire. For mine, I normally use 13 boards, making them 2 1/2′′ broad.
Equipment And Materials:
Poplar Boards
1/3 (recommended for paint OR wood species of your choice)
14″ plywood (birch is ideal for tasks requiring paint OR mix and match 13 wood species)
Miter Saw
Trim Table for Router Round Over Router Bits Saw
Diablo Sandpaper and a Dado Blade Sander
Hefty clamps
Concealed Hinge Jig Dowels Wood Glue Dowel Jig Concealed Hinges
10-foot Podium Ladder by Werner
Some Tips for How to Make a Beautiful Cabinet Door
Ensure that the wood is straight. You will get twisted and warped cabinet doors from warped and twisted boards (which will not lay flat against your cabinet). Spend some extra time making sure that all of your boards are straight. To make sure you get your DIY cabinets off to the right start, look over this advice on purchasing lumber.
For durable, robust doors, choose hardwood. Although hardwood is not the cheapest option, it will end up being worthwhile.
Without a Router, How to Make Cabinet Doors?
You can still create stunning cabinet doors without a router. The mission-style open shelf bathroom vanity’s cabinet doors were constructed using only a saw and Kreg Jig. I cut the plywood center panel with a circular saw equipped with a guide track after carefully cutting the rails and stiles with a miter saw.
This straightforward shaker-style door is the ideal option for a novice woodworker. These cabinet doors’ center panel is composed of 1/2-inch plywood so you may join it to the rails and stiles without a center groove, eliminating the need for a router.
Determine the final cabinet door size, then use the formula below to determine the size of your stiles, rails, and center panel:
- Staves should be cut to the final cabinet door height.
- Reduce rails to the final cabinet door width minus the stiles’ width (x2)
- The Center panel should be cut to the final height of the cabinet door less the width of the rails (x2 and the final width of the cabinet door less the width of the stiles (x2)
Step 1: Measure and cut your rails and styles. Cut a 1/2 inch plywood piece for the center. Use a circular saw with a guide track to quickly and easily cut plywood.
Step 2: Drill pocket holes in the top and bottom of the middle panel with a 1/2′′ thick material (the sides that will touch the rails). The size of the cabinet door will determine how many pocket holes are needed. The pocket holes should be spaced no more than 6′′ apart (4-5′′ is ideal).
Step 3: Use wood glue and 1′′ pocket hole screws to fasten the rails to the center panel’s ends. The center panel should be put 1/4″ back from the front and flush with the rails on the back of the cabinet door.
Step 4: Drill pocket holes for 1/2′′ thick material in the sides of the center panel and 1 pocket hole for 3/4′′ thick material at each end of the cabinet door rails. The size of the cabinet door will determine how many pocket holes are needed. The pocket holes should be spaced no more than 6′′ apart (4-5′′ is ideal).
Step 5: Use 1′′ pocket hole screws to secure the stiles to either side of the center panel, and 1 1/4′′ pocket screws to secure the rails to the stiles.
Step 6: Insert plugs into the pocket holes if desired. Your new DIY cabinet doors just need to be finished with sanding before installation!
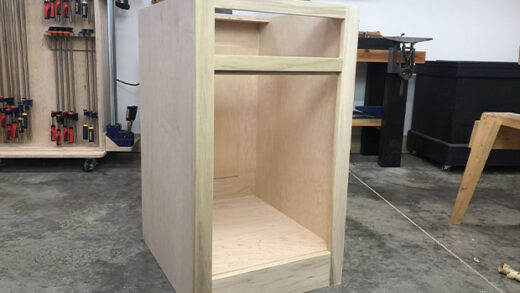
You May Also Like: How To Build A Simple Cabinet Box?
With a Router, How to Make Cabinet Doors?
Not prepared to construct entire routed cabinet doors? With floating center panels, it is still possible to create stunning DIY cabinet doors. Pocket slots on the rails make it simple to connect these doors together. Additionally, you have two options for cutting your groove: a table saw or a 1/4″ straight router bit.
Determine the final cabinet door size, then use the formula below to determine the size of your stiles, rails, and center panel:
Staves should be cut to the final cabinet door height.
Reduce rails to the final cabinet door width minus the stiles’ width (x2)
The Center panel should be cut to the final height of the cabinet door less the width of the rails (x2) plus the depth of the groove (x2) and the final width of the cabinet door less the width of the stiles (x2) plus the depth of the groove (x2). In order to ensure a tight fitting center panel without rattling, I also like to subtract 1/4″ from the calculated width and height of the center panel and use cabinet door space balls.
Step 1: Measure and cut your rails and styles. Cut a 1/4″ thick piece of plywood, MDF, or beadboard for your center panel. Use a circular saw with a guide track to quickly and easily cut plywood.
Step 2: Mark with a pencil the width of your rails, minus 1/2 inch, as measured in from either end of the stiles. To ensure that there is no groove where you will be joining the boards and that they join properly, this is where you will start and stop your center groove.
Step 3: Adjust your router bit so that it will create a 1/4-inch-deep groove by using a 1/4-inch-wide straight bit (typically, you can do a larger groove if you want). From mark to mark, cut the stiles’ groove. Along the full length of the boards, cut the rails’ groove.
Step 4: Drill two pocket holes on each end of the cabinet door rails that are set for 3/4″ thick material. Attach both rails to one of the stiles with wood glue and 1 1/4′′ pocket hole screws such that the top/bottom of the stiles is flush with the outer border of the rails and the groove in the center lines up.
Step 5: Insert two space balls into each rail and stile’s groove if you’re using them. The middle panel is then moved into position.
Step 6: Attach the other stile to the side of the cabinet door using wood glue and 1 1/4′′ pocket hole screws. ensuring that the cabinet door is square and the rails are aligned.
Step 7: Insert plugs into the pocket holes if desired. Your new DIY cabinet doors just need to be finished with sanding before installation!
Do you know how to make a cabinet door now? Start now, a beautiful cabinet door is waiting for you!
Read More: Types of Cabinet Doors