Learn how to paint oak cabinets with this detailed tutorial that includes tips for filling in the oak grain for a super smooth finish!
One of the most worthwhile DIY projects I’ve ever attempted was painting our oak cabinets. One of the best, in all sincerity.
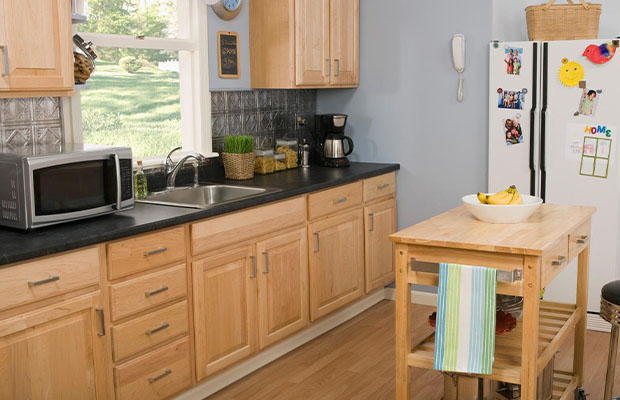
How to paint oak cabinets? To start, use a powerful detergent to thoroughly clean the cabinets, removing any surface oils. Then, lightly scuff up the surfaces of the oak (and laminate, if you have them) using fine-grade sandpaper (100-120 grit). To learn more, read our step-by-step guide.
Table of Contents
What To Do Before Painting?
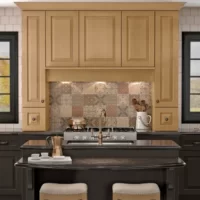
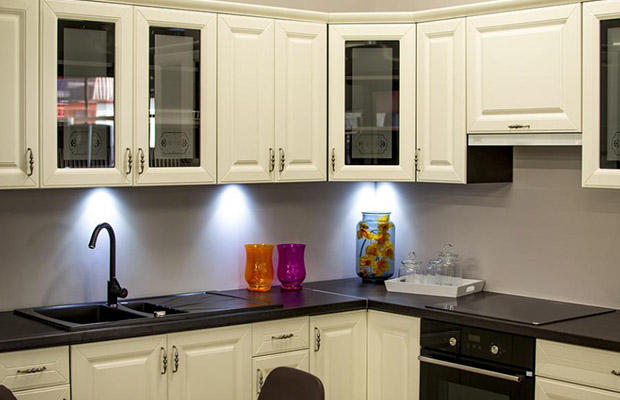
You might think that your oak cabinets, especially if they have a shiny finish, are old and worn out. We can assist you if you’re prepared to paint oak cabinets yourself. With the right preparation, you should be able to paint your cabinets any color you want, even if some of them are laminate. For best results, adhere to our instructions.
To start, use a powerful detergent to thoroughly clean the cabinets, removing any surface oils. The surfaces of the oak (and laminate, if you have it) should then be lightly scratched with fine-grade sandpaper (100-120 grit).
You May Also Like:
Step By Step Guide To Paint Oak Cabinets
Step 1: Gather Your Supplies
Make sure you collect each item on the list. I can assure you that once the project is underway, you won’t want to stop and go to the hardware store.
Step 2: Remove Everything From The Room
I mean everything. There will be a ton of dust produced! You’ll want to thoroughly clean out all of your junk drawers and cabinets. I had a good chance to use some tough love and get rid of the kitchen gadgets and supplies that were collecting dust. Depending on how disorganized you are (and I was extremely disorganized! ), this process alone could take you a while.).
Step 3: Remove And Number Doors & Drawers
Save hardware in baggies or envelopes labeled with the corresponding numbers if you’re doing so. We omitted this step because we were replacing the brass/porcelain hardware. Since our cabinets were custom-built (rather than being pre-built one at a time), each door has a slightly different size, but we still took care to number our doors and drawers. It’s a good idea to number everything, just in case, no matter what.
Step 4: Vacuum Cabinet Boxes And Wipe Down With Tsp Substitute
To avoid affecting your final finish, make sure there isn’t any dust or dirt inside or on any of the cabinets. You can probably use your standard vacuum for this step if you prefer. Use TSP substitute to clean afterward. We wanted to stay away from actual TSP because we were residing in the home while it was being renovated. Although the substitute is an excellent alternative, you should still use it with adequate ventilation because it is a chemical.
Step 5: Remove All Of The Appliances
It is best to remove your appliances and store them safely away if you want an all-over finish. This means to leave the space entirely. We made an effort to put off taking this action as long as we could to keep our kitchen in working order.
Step 6: Seal Off Your Kitchen
There will be a LOT of overspray and dust, as was mentioned in Step 2 as well. Your floors and walls should be completely covered in plastic, and you should seal off any openings to adjacent rooms. Additionally, you should guard your countertops. Cover anything that you don’t want to have white paint flecks on it forever! By the time you’re finished, your room will probably be made of plastic! We had to use Gorilla Tape to secure the plastic sheeting to the ceiling because the painter’s tape wouldn’t hold because of the textured plaster ceiling.
Step 7: Sand Cabinet Faces With 80 Grit Sandpaper
To lessen the effect of dust on the entire room, we attached our orbital sander to our shop vac. We concentrated on the broken parts (there were a lot, especially under the old hinges and around the sink). Because it will be useful in the following step, it is acceptable to leave some dust on the cabinet faces.
Step 8: Sand With 220 Grit Sandpaper
Make use of the shop vac-mounted orbital sander. You want to avoid leaving any dust behind at all costs this time. Go around with a tack cloth and wipe everything down (Use a dry cloth instead of a damp one. It will remove the Drydex from the grain).
Step 9: Primer
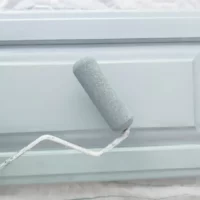
If you only do your cabinet faces and ends, this will take you much less time. I used a mini roller, a brush, and Kilz Original Primer to complete the job because we decided to paint the inside of the cabinets as well (there were numerous stains and damage).
Due to the tannin in oak, it’s crucial to use an oil-based primer. If you use a water-based primer, the orangey-brown oil tanin will show through. The Cabinet Coat supposedly included primer, as was stated to us. It does, which is fantastic on maple or pine, but on our test swatch of oak, we ended up with tannin swirls without the primer. If you want to learn more, read our post on how many coats of primer on cabinets.
Read More: Best Paint Brush For Cabinets
Step 10: Sand With 320 Grit Sandpaper
Do you yet adore sanding? Sanding is now your best friend (HA!). Because the orbital sander will remove too much primer, lightly hand sand the entire surface. An abrasive block is what I advise. I explored every possibility for this project, so trust me. Regular sandpaper is much harder to hold than the sanding block. After using a brush shop vac attachment to remove all of the dust, reapply the tack cloth for good measure.
Step 11: Primer Again
We discovered that preparing a mostly solid white canvas for the final coat of paint makes it much simpler to achieve the desired coverage. Actually, the primer is your project’s workhorse—aside from you, of course!). Until you are confident that the cabinets are white, repeat the previous steps.
Step 12: Prep Doors & Drawer
If your door or drawer has routed areas, I suggest using a smaller putty knife to get into the detail while applying your Drydex.
The air compressor and the Kilz Spray Primer, two items that were listed on the Materials List as optional, are used in this step. It is quicker to use the air compressor to spray the details to remove dust after sanding between coats (as opposed to using a tack cloth). Although it is convenient if you already have one, you are not required to purchase one in order to complete this project.
Additionally, using the cans of spray primer on your doors and drawers is much quicker if you have a space for doing so and adequate ventilation. We took the drawers and doors to a professional spray booth because we had access to one, where we applied the primer. Compared to a brush, it undoubtedly captured the details better. We used at least 12 cans of spray, so it was more expensive but so much faster. When spraying with aerosol, just as with any project, be sure to wear a safety mask!
Step 13: Caulk All Cracks And Detail (optional)
When we completed the project, my biggest error was leaving this step until last. Although the caulking had aged for five years, the paint had not. Caulk before applying the final coat of paint, don’t make the same mistake I did!
I should also point out that this step is optional. Due to the expansion and contraction of wood, the caulk could crack. This is the reason, according to a local custom cabinet maker I spoke with, they don’t caulk all of the seams.
Step 14: Prep Your Paint & Paint Sprayer
You must mix distilled water with the Cabinet Coat, as was already mentioned. It’s best to adhere to the dilution guidelines when using a paint sprayer, but adjustments might still be necessary. Now is the time to use your measuring cup! Be mindful of the amount of distilled water you’re using. Make a note of the proper dilution once you have determined it so you can re-diluting the refills accordingly!
Step 15: Test The Sprayer
Whatever you do, resist the urge to start spraying as soon as you point your sprayer at the cabinets. Use a test board (we used an extra piece of leftover drywall) even after each refill to confirm that your paint sprayer’s adjustment is accurate.
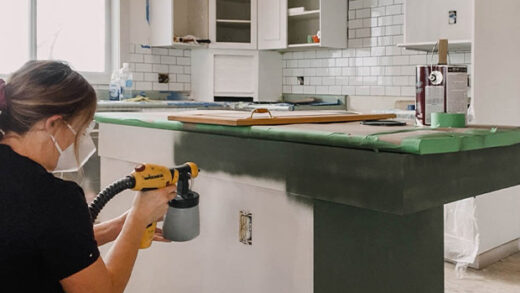
Step 16: Paint Cabinet Boxes With Sprayer
The inside back of the cabinet’s face frame is an illustration of a difficult area. It’s always simpler to fill in a sizable flat area rather than take the chance of overcoating hard-to-reach areas. Do not forget that you must sand again if you overcoat. 🙂 Additionally, if you’re avoiding already wet surfaces, those awkward angles become even more challenging to paint.
The best method is to continuously move the sprayer in long, fluid strokes. Depending on the direction of the surface you’re painting, you can rotate the sprayer’s nozzle to make horizontal or vertical strokes. On the cabinet boxes, we applied two coats, allowing plenty of time for drying in between.
Step 17: Set Up Doors And Drawers And Spray
Spraying requires that the doors be set up upright. We created a “spray booth” of sorts in our basement by putting a drop cloth over our workbench and putting a piece of scrap drywall behind it. The technique mentioned above was used to begin with the backs and spray.
We sprayed the second coat after giving it some time to dry. The doors were then turned over, and the procedure was repeated twice. We then carried out the procedure once more on the drawers, choosing to paint both the exterior and interior. You may need to apply more than two coats to your cabinet doors and drawers, but we believe two is the minimum. After all of our priming, we only needed two coats, which was plenty for us!
Related Reading: